August 29, 2012

Hand Turned Wood Bracelet


Hey everyone!  The tutorial for my Hand Turned Wood Bracelet was posted yesterday over at So You Think You're Crafty.  You should go check it out by clicking HERE.

August 28, 2012

Photo 366 #34 & 35

Yeah, with the craziness of the finale last week, plus getting my oldest ready for Kindergarten, I was not able to get last week's Photo 366 up.  I am combining the last two weeks together.  Be prepared for photo overload!

August 14 - Some screws that I was using when making my hand turned wood bracelet.


August 15 - Went to a small water park with the kids.  They had a blast!  Wish I knew about this place earlier in the summer.


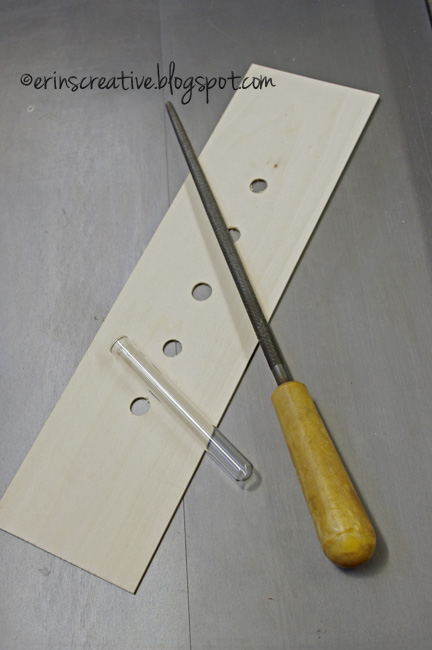
August 16 - I think this is one of the better product style photos I have ever taken.  I think this Photo 366 challenge has definitely helped me in that area of photography.


August 17 - Pic of a little tank made from bullet casings that I got for my husband.


August 18 - After a very light rain, I went out to my car and found this feather stuck to it.  I'm fairly certain that a dove flew into my car for this to get there like that, as it wasn't windy at all, and this is the side of my car.  They don't seem to be the brightest of birds.


August 19 - Getting my tools ready to cut the large mirror.

 
August 20 - My dog Animal basking in the sunlight in the backyard.


August 21 - How I often looked over the last few weeks.  Gear up!


August 22 - Very late at night, just after I hung the mirror completed on the wall!  Whew, it didn't fall down!


August 23 - Saw this sticker placed on a stop sign near my house and love it!  A great message, "Live Without Fear!"


August 24 - The kids and I caught this tree lizard to inspect it.  It has the tiniest little nails.  We released him shortly after catching him.


August 25 - I noticed this rainbow on my wall/ceiling.  Thought it was pretty, so I took a photo of it.  I can thank the reflector from my bike outside for this.


 August 26 - Maben has decided he is going to be the next American Ninja Warrior.  Here he is practicing his climbing skills in the hallway.


August 27 - First day of Kindergarten.  This is his favorite, "I'm cute" pose.  I have to agree he is super cute!


August 27, 2012

I'm In The Finale!!!

Today is a big day; seventh wedding anniversary, first day of kindergarten for my oldest and I am in the finale of So You Think You're Crafty!  Could today be any more exciting?!?

The Finale is a wild card.  We could do whatever we wanted and my philosophy was to, "GO BIG or GO HOME!"  I went big and hope you love my Arts and Crafts mirror as much as I do.  I spent a lot of hours building this entire piece.  Each and every detail was done by my hands.  I would appreciate it if you go and vote here


I Remembered The Date!

My husband and I have been married for seven years today.  Happy Anniversary hunny! 


This year is extra special, because one of us finally remembered our Anniversary date correctly! 


We were married on the 27th, my husband always thought it was the 26th and I knew it was a day off, but I picked the wrong direction and thought it was the 25th. 


We have argued over it several times, I have pulled out our marriage certificate to only find we were both wrong...often. 


We have even celebrated it on the wrong day before.  I'm glad we both have a wonderful sense of humor about it all. 


I guess after seven years, someone had to get it right.  Congrats hunny, you got me this year!  Yes, I thought it was the wrong day, again! 


I'm happy that I married my best friend.  I love our honesty and our ability to laugh at ourselves and each other. 


I love that we share some hobbies together.  I really needed someone who has a love for power tools like I do.  


I love that our favorite movies to see together are awesomely bad action flicks. 


I'm glad that I knew I was going to marry you way back when you went to Kentucky.  I'm really glad that you came around to that idea years later! 


Happy Anniversary hunny!  I hope next year treats us as well as this past year has.  I love you!

August 22, 2012

Checking In

Sorry about the lack of Photo 366...it will go up sometime this week.  Right now I am just busy, busy, busy busting out my finale project for So You Think You're Crafty.  I can't wait for you to see it!

So, in the mean time, I will leave you with one of my personal favorite photos so far from my Photo 366.  This was taken back on March 25th. 


August 20, 2012

SYTYC - The Top Three

I am bursting with excitement.  I am in the top three for So You Think You're Crafty!  This week is DIY Jewelry.  I'm so super proud of my jewelry.  I would be even prouder if all my readers went over and voted. 

Next week is the Finale...I hope I make it in.  I have been working on something super awesome.


August 18, 2012

Test Tube Vase: Tutorial

Building the Test Tube Vase was quite easy and came together quickly.  You will need to find test tubes in order to do this build, Amazon has quite a few to choose from.  I understand not everyone will be able to find them at a thrift store, but it's awesome to know that there is such a wide selection out there.  You know, in case I decide to make some for gifts.

Not all test tubes are the same size, so when drilling holes, please keep in mind that what size drill bit I used, may not work for you.


After you acquire your test tubes, you will need two boards.  One for the base, one for the arch.

My Base: Curly maple, exact dimensions 14 x 3 3/8 x 11/16"
My Arch: Bass wood, exact dimensions 15 3/16 x 4 x 1/16"

The curly maple was leftover laying around the garage from a project my husband did and I picked up the bass wood at Hobby Lobby, it's mixed in with the balsa wood for building airplanes or doll furniture.


I came up with the length of the bass wood based on trial and error.  Not every piece of wood will bend the same way, so I cut the grooves in the maple first.

I set up the table saw at a 45 degree angle and marked in 3/4" from each edge.


I then ran it through the table saw to cut the grooves.  I used a miter sled (shown above) to make sure that I cut my groove straight.  I set the saw up to only cut 3/8 deep.


Once the grooves are cut, play with the bass wood to get the right length for your arch.  Once you figured out your length, you will need to mark where you want your test tubes to sit.  I started by marking the center of the bass wood and I set mine 1 3/4" apart. 

I used a 1/2" HSS (high speed steel) drill bit, even though my test tubes were larger than that.  I have larger drill bits, but not the right type and I didn't want to risk splitting the board.


After drilling the holes, I traced the mouths of the test tubes and took a round file to rough out the holes to the correct size.  The holes on the outside need to be made into a slight oval, because of the bend.


To get the perfect fit, it's all trial and error.  Keep setting your arch into your base board and try inserting the test tube until you get the right fit.


Once you have what you think is the right fit, take your piece (just like the photo above) over to your drill press.  

Your holes will be larger than your drill bit, so center your drill bit and set your stop.


The stop is shown above.  The holes you are drilling is so that the test tubes have a place to set without slipping around.  I set my stop up to stop my drill bit from going any further than 1/8" deep.


Once you are done with the drill, take your base and arch apart.  I hand sanded the arch and used the oribtal sander to sand the base.  I took it to 220 grit sand paper.  


I then stained and dyed my pieces.  You can take a look at all the dying fun right here.  The staining of arch needed only one coat on each side.  The basswood soaked it all in very quickly and evenly.


I did a shellac finish on both the arch and the base once the dye and stain dried.


In order to the apply the shellac, I use a process that my husband showed me.  You will need some batting, a lint free rag and a binder clip.  Our rag is an old white t-shirt.  Place the batting on top of the rag.


Wrap the batting inside the rag, then attach the binder clip to hold it all together.


The binder clip also provides a nice handle to hold onto.  I did quick thin layers of the shellac, making sure that they were completely dry between coats.  I also buffed it up between coats with some fine steel wool.


Once the shellac was completely dry, I took a new, clean rag and applied a Renaissance wax finish on top.  It's not the cheapest stuff, but the quality is amazing and you do NOT need a lot to get the best results.  It helps protect pieces from dust, fingerprints and liquids.  

Once you have completed your finishing process, put the arch back in the base, insert your test tubes and add some flowers and water!  Then marvel at the beautiful piece you made.


Sharing this over at:
So I Married A Craft Blogger: Man Up Link Up II
Sugar Bee Crafts: Take-A-Look Tuesday

August 14, 2012

Photo 366 #33

I am suffering from serious Olympic hangover.  I love the Olympics and watch as much of it as my family will let me.  I stayed up too late and am far too tired.  Now, onto Shark week...I cannot get enough sharks.  Love them!  I am seriously one tired woman.  Some of my photos this week happened to be the first thing that I saw.  I think I took fewer photos this past week than I had any other week during this challenge.

August 7 - It was late and I realized I hadn't taken a photo.  Here is my laptop keyboard.  Those are Photoshop sticker shortcuts.  These have made editing photos SO MUCH EASIER.  Now, when I want to switch from the zoom to brush tool, all I have to push is the letter 'B.' Thank you hubby for an awesome birthday present!  They have been on my laptop for over a month and no sign of peeling up either!


August 8 - I took a photo of the sun through some vinyl blinds.  I have always loved/hated the optical illusion that it plays on your eyes.


August 9 - My hubby and I were being silly one day and kissed each other through the glass door.  I noticed a few days later that my lips were still there.  In other words...I need to wash my windows.


August 10 - We had some rain storms roll through.  When it passed I saw the awesome golden glow just radiate through my house, so I ran outside to take a look and saw the strangest clouds I have ever seen. The photo is in focus.  Those clouds towards the top, that's what they really looked like.  Have you ever seen clouds like that?  Anyone know what causes it?


August 11 - Maben was invited to a Mermaids and Pirates birthday party.  What a wonderful party it was.  Maben has an amazing time and here he is posing with his best mermaid face.  I was informed that mermaids make fish faces.


August 12 - Here are the boys taking a break from running in the sprinklers to pose for a photo.


August 13 - Colton was hanging out with me in the art room.  While I was working on his baby book (yeah, he's not really a baby anymore, but I am determined to get this done before he realizes I waited so long), he was busy painting.  Here he is painting a monster who sneezed.


You Might Also Like

Related Posts Plugin for WordPress, Blogger...